


Understanding Drywall Basics
What is Drywall?
Drywall, also known as gypsum board or plasterboard, is a building material used to create interior walls and ceilings. Composed of gypsum plaster sandwiched between two sheets of thick paper, drywall is favored for its ease of installation and ability to provide a smooth surface for finishing. This material has revolutionized the construction industry due to its versatility and efficiency. It can be cut to size, making it easy to fit into various spaces and can be painted or textured to create appealing finishes.
Benefits of Using Drywall
The use of drywall brings numerous advantages to both professional builders and DIY enthusiasts. First and foremost, drywall is lightweight, which simplifies installation and reduces transportation costs. It also offers excellent fire resistance, especially with specialized types of drywall, making it a safer choice for homes and commercial properties. Additionally, it provides a good baseline for insulation as some drywall products come with insulation properties, contributing to energy-efficient structures. In summary, the durability, ease of maintenance, and aesthetic versatility of drywall make it a go-to option in modern construction.
Types of Drywall Available
Understanding the various types of drywall is crucial for making informed choices for your projects. Standard drywall is used for most interior applications, while moisture-resistant drywall, often green or blue in color, is ideal for areas exposed to high humidity, such as bathrooms and kitchens. Fire-resistant drywall is designed for use in places requiring enhanced fire safety, typically containing additional additives to impede flames. Beyond these, there are specialized types like soundproof drywall, which helps reduce noise between rooms, and impact-resistant drywall, perfect for high-traffic areas where extra durability is desired.
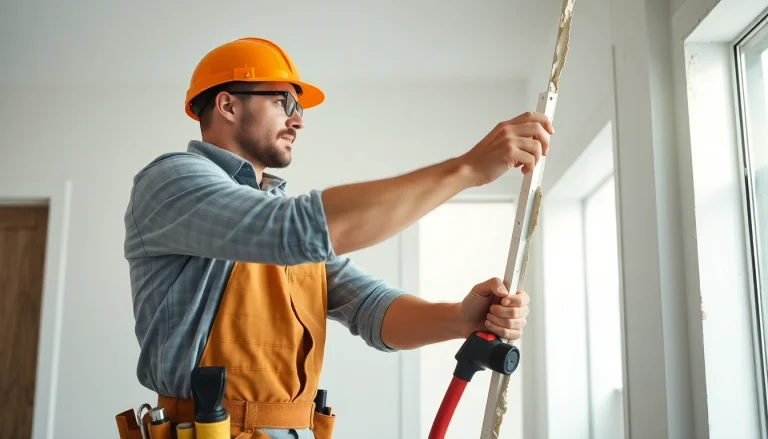
Tools and Materials Needed for Drywall Projects
Essential Drywall Tools
Equipping yourself with the right tools is vital for any drywall project. Key tools include a measuring tape for precise measurements, a utility knife for cutting drywall sheets, and a drywall saw for more intricate cuts. Other essential tools consist of drywall screws and a screw gun for installation, a t-square for ensuring straight cuts, and a corner knife tailored for finishing corners. Investing in a good-quality mud pan and taping knife will also enhance your ability to apply joint compound smoothly.
Choosing the Right Drywall Material
Selecting the right type of drywall for your project directly impacts its outcome. For most interior walls, standard gypsum board works well; however, if you’re working in moisture-prone areas, opt for moisture-resistant drywall. Fire-resistant drywall should be prioritized where building codes demand firmer safety measures. Pay attention to the thickness of the drywall as heavier varieties provide added soundproofing and durability. Assess the specific needs of your project before making a purchase—you’ll find that choosing the right drywall type can streamline installation and enhance the longevity of the walls.
Necessary Safety Equipment
Safety cannot be overlooked when working with drywall. Essential safety gear includes safety goggles to protect your eyes from debris, dust masks to avoid inhalation of particles, and gloves to shield your hands when handling heavy boards. Depending on your working height, consider using a safety harness or having a sturdy ladder. Implementing proper safety measures not only protects you but also increases your efficiency on the job.
Step-by-Step Drywall Installation Guide
Preparing the Workspace
Before diving into the installation process, preparing the workspace is crucial. Start by clearing the area of any furniture or obstructions to create a safe and accessible environment. Ensure the floor is clean to avoid slipping hazards and other risks. It’s also advisable to check the framing and insulation within the wall cavities to ensure they meet required standards. Having a well-prepared workspace sets the foundation for a successful drywall project.
Measuring and Cutting Drywall
Precision is key when measuring and cutting drywall. Use a measuring tape to determine the height and width of the spaces where drywall will be installed. Mark the measurements on the drywall with a pencil. A utility knife works best for cutting; press the blade against your marked lines and score the paper before snapping the drywall along the cut. This technique minimizes waste and ensures clean edges. Accuracy at this stage saves time and effort during installation.
Hanging the Drywall Properly
Once cut, it’s time to hang the drywall. Begin by positioning the first board against the wall, with the bottom edge resting slightly above the floor. Use drywall screws to fasten the board to the wall studs, starting from the center and working outwards to prevent warping. It’s advisable to stagger the seams of the drywall sheets, as this adds structural integrity and reduces the chance of cracking. Installing drywall can be physically demanding, so be prepared and make sure to work with a partner for larger sheets to achieve the best results.
Finishing Techniques for Drywall
Applying Joint Compound
After the drywall is hung, the next step focuses on the finishing process, starting with joint compound application, often referred to as „mud.“ The goal here is to create a smooth, even finish that hides the seams and fasteners. Start by applying a thin layer of joint compound over the seams and screw heads using a 6-inch taping knife. Allow it to dry before applying additional layers, thinning each successive layer to achieve your desired finish. Patience is key in this process; a well-finished wall requires multiple applications of compound followed by drying time.
Sanding for a Smooth Finish
Once the joint compound is dry, sanding is essential to attain a flawless surface. Use fine-grit sandpaper or a sanding block to gently smooth out the areas with compound, being careful not to over-sand and damage the drywall surface. A pole sander may come in handy for higher areas. Remember to wear a dust mask while sanding to avoid inhaling the fine particles, and always clean up the dust after each sanding iteration to assess your progress accurately.
Painting and Texturing Options
Once the drywall is primed and sanded, it’s time to make your walls visually appealing through painting or texturing. For painting, choosing a high-quality primer followed by your selected paint will provide a durable finish. If you’re considering texture, there are multiple approaches such as knockdown, slap brush, or popcorn textures which can add character to your walls. Each technique requires different methods of application, and adding texture can also help camouflage imperfections.
Common Drywall Mistakes to Avoid
Poor Measurements and Cuts
One of the most common mistakes made during drywall projects is inaccurate measurements. Double-check all measurements before cutting to minimize waste and ensure all pieces fit properly. Mistakes at this stage can lead not only to additional material costs but also to extensive rework. Using a chalk line or laser level can greatly assist in achieving straight cuts and accurate placements.
Inadequate Joint Compound Application
Over or under-applying joint compound is another frequent pitfall. Too much compound can lead to cracking as it dries, while too little may leave seams visible. Apply in thin layers, allowing adequate drying time between applications. Remember, a good finish necessitates patience and time; don’t rush the process.
Neglecting Safety Precautions
Finally, neglecting safety precautions can lead to injuries or hazards on the job site. Always wear protective gear like goggles and masks, particularly during sanding or mixing compounds. Ensuring you have a safe working environment not only protects you but also permits you to focus entirely on the task at hand, leading to a higher-quality end result.
Frequently Asked Questions about Drywall
1. How do I know what type of drywall to use?
Choose standard drywall for most applications; however, use moisture-resistant types in humid areas and fire-resistant drywall where necessary.
2. How thick should drywall be for ceilings?
Typically, 5/8 inch thick drywall is recommended for ceilings as it provides additional strength and minimizes sagging compared to thinner options.
3. How long does it take for joint compound to dry?
Joint compound usually takes 24 hours to dry, but drying time can vary based on humidity and temperature. Always check before applying additional layers.
4. Can I paint directly on drywall?
No, it’s important to first prime the drywall with a quality primer before applying paint to achieve a better finish and help the paint adhere properly.
5. What is the best way to texture drywall?
Texture can be applied by using a spray gun, brush, or sponge. Each method offers unique finishes, so choose based on your desired aesthetic and skill level.